OK RTTY Cabrillo File Creation
Instructions on how to create a Cabrillo log file from your OK DX RTTY WriteLog contest file.
Some later versions of WriteLog will not allow a Cabrillo log file to be created from the OK DX RTTY module. When you attempt to create the Cabrillo file, you get a dialog box like this.
This is a workaround discovered by Bernd DC3HB that is easy to do.
1. Open your existing WriteLog OK RTTY DX file.
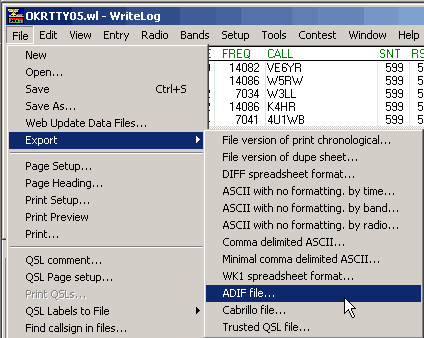
2. From the File menu, go to Export and select ADIF file…
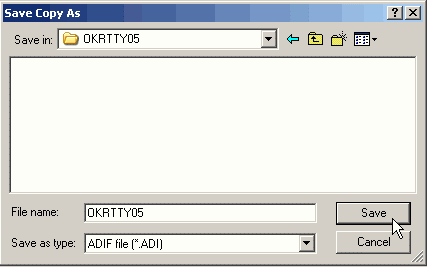
3. Save this file on your hard drive. It is recommended you save this file in a separate folder where you will remember where it is.
4. Close WriteLog.
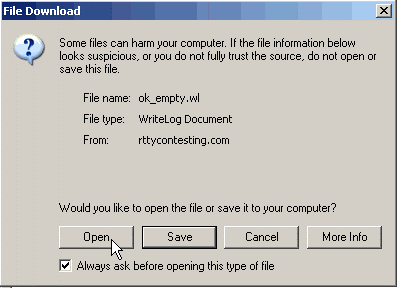
5. Download the empty OK RTTY file from an earlier version of WriteLog created by Bernd DC3HB by clicking here. When the File Download dialog box opens, click Open. This should open the file in WriteLog. (If for some reason it doesn’t, click here again and this time Save the file to your hard drive. Then start WriteLog and open this file).
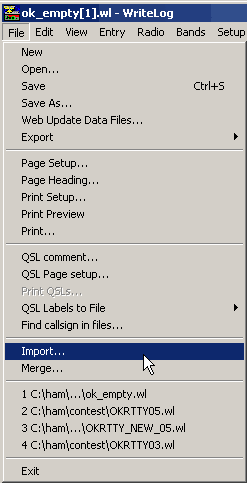
6. With the empty OK contest file open, go to the File menu and to Import.
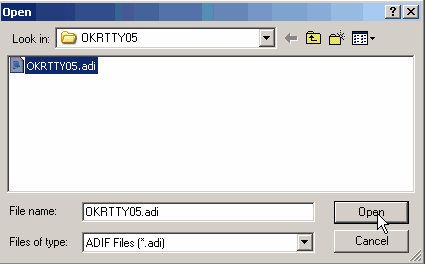
7. In the Open dialog box, navigate to the ADIF file you created in step 2 above and open it.
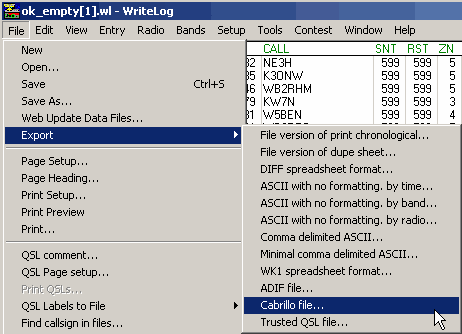
8. Once all the log info is imported, go to the File menu and to Export and select Cabrillo file…
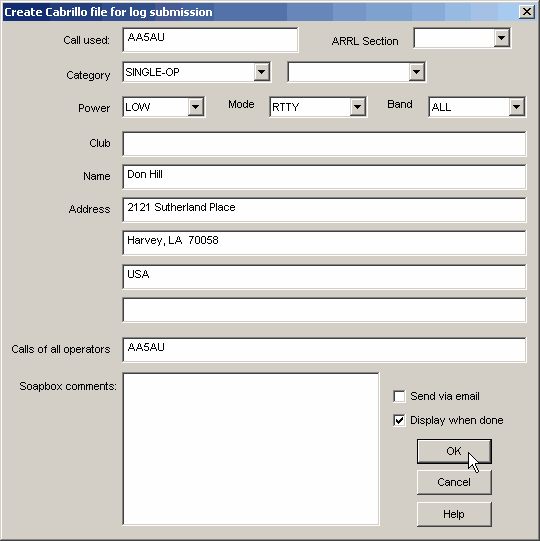
9. When the “Create Cabrillo” window opens, select the correct Power and Mode and fill in any other needed information. Also, check the box for “Display when done” so your Cabrillo file will open up automatically after you save it. Click OK when finished.
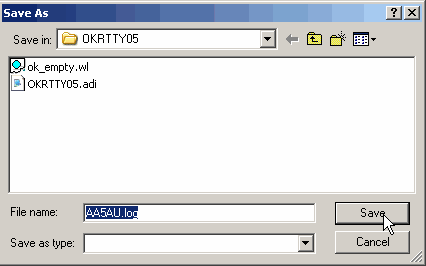
10. When the “Save As” dialog window opens, save your Cabrillo log on your hard drive.
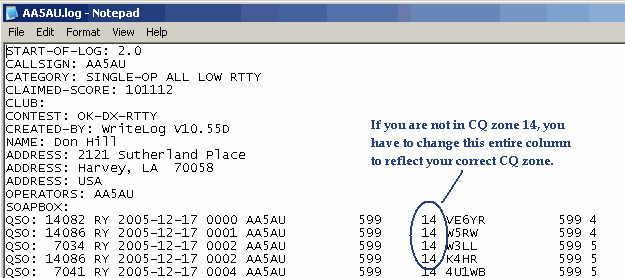
11. The Cabrillo file will open automatically. If you forgot to select “Display when done” in step 9, simply open your Cabrillo file from its location on your hard drive. With the new Cabrillo open in Notepad (or other text editing program), you will notice that the zone given for your station is zone 14. If you are located in CQ zone 14, then you do not have to change anything and you are finished. However, if you are not in CQ zone 14, you need to edit your log to reflect the correct zone.
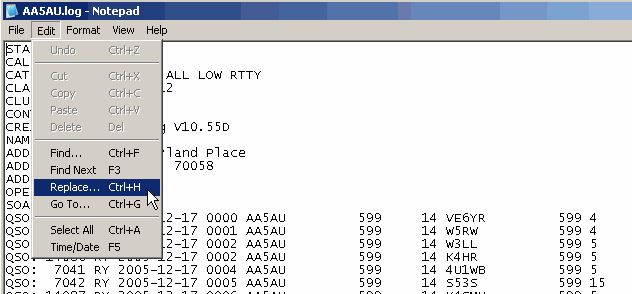
12. If you are using Notepad, this can be done easily using the Find and Replace feature. But you must be cautious. You cannot simply replace each “14” in the file with your correct zone because every instance of “14” will be changed. For example, I’m in zone 4. If I replaced every 14 with 4, then my 20 meter frequencies would also be changed. 14082 would become 4082 and the stations you worked in zone 14 will be changed to your zone. So in order to change all the 14’s in the zone column, you can use spaces in front of the 14. I will explain this further in step 13. For now, go to the Edit menu and select Replace.
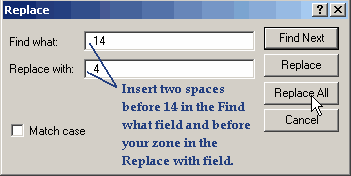
13. This step is important. When the Replace dialog box open, type two spaces then 14 in the “Find what:” field. In the “Replace with:” field type two spaces then your CQ zone number. When finished, click the Replace All button and Notepad will replace all 14’s preceded by two spaces with your zone number preceded by two spaces.
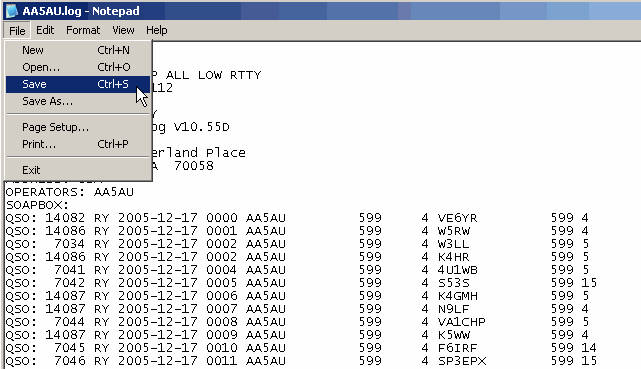
14. As you can see below, all zone 14’s have been replaced by zone 4. The other 14’s in the file were unaffected because they were not preceded by two spaces. Now save this file and you are finished.
15. Now close WriteLog. It will ask you if you want to save the file, say no since it’s no longer needed.
Thanks to Bernd DC3HB for this workaround.
73, Don AA5AU


